Machine Quilting frames, raw edge applique

Red Berry Raw Edge Applique

raw edge appliqueI've been loving Raw Edge Applique for the past few years. I enjoy how fast and easy it is to make a pop of colour! Usually,  raw edge applique is done sitting down at the sewing machine.  But this tutorial is different.

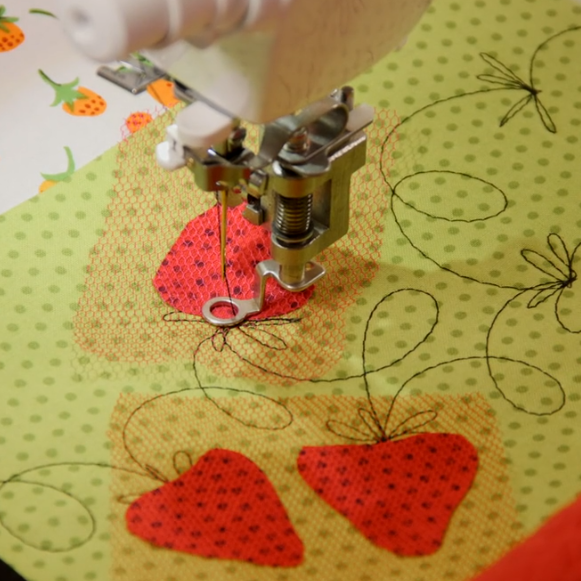
We'll show how to raw edge applique using a free motion quilting technique directly on your quilt on the frame.

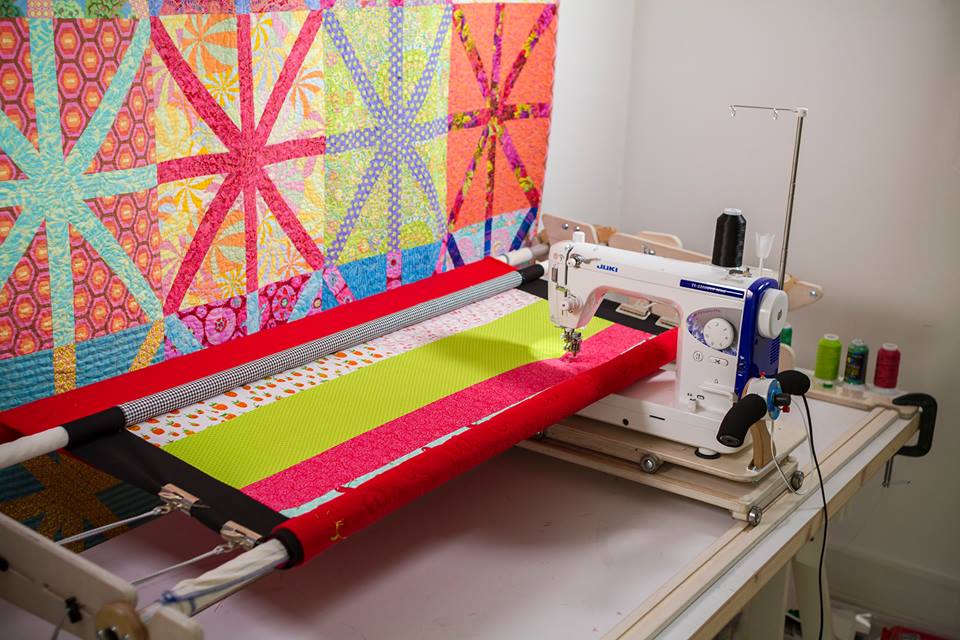
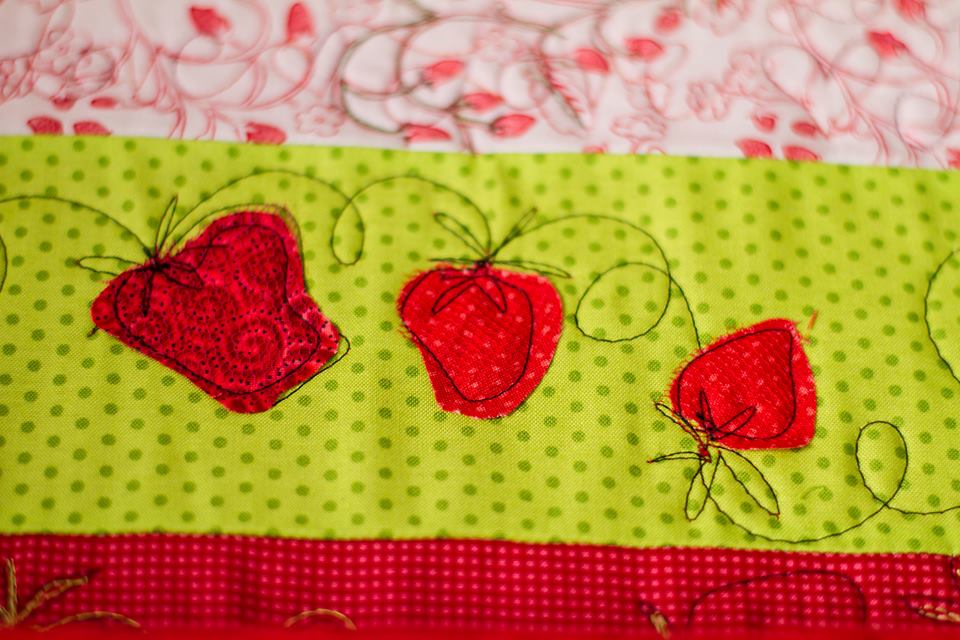
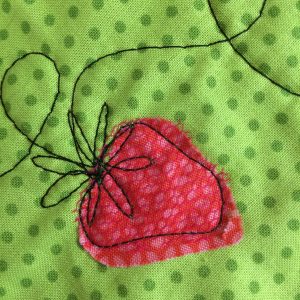
Inspired by red berry summer fruits, we'll be appliqueing lots of luscious strawberries in a variety of shapes, colours, fabrics and threads. First lets talk frames. Usually we think of our quilting frames as holding the quilt sandwich layers perfectly tensioned for quilting. but art quilters use the Machine Quilter frames just like an easel.

Machine Quilter frame works like an easel

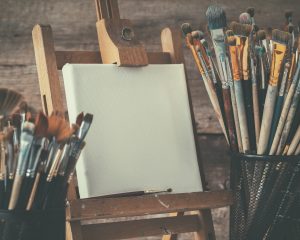
 The Machine Quilter frames act like an easel.

The wooden frame holds the layers of your quilt steady and perfectly tensioned just like a canvas.  Your sewing machine becomes a pen or paint brush and the thread becomes the paint. In this ARTY tutorial we'll show you how to use your Machine Quilter frame like an easel and to draw with your sewing machine needle. We'll also show how to create splashes of colour with raw edge applique directly on on the Machine Quilter frame!

Juki TL QVP Mini

The Machine Quilter frame  has a set of carriages that glide on a set of tracks. Place your sewing machine on these carriages and you can effortless glide it every-which-way at the touch of a finger.

The quilt sandwich becomes the canvas and the sewing machine needle becomes the pen. Now you can draw with your needle!

My favourite pen is the Juki TL 2200 QVP Mini straight stitch. Find out why. 

thread becomes paint retro styled easel and paints

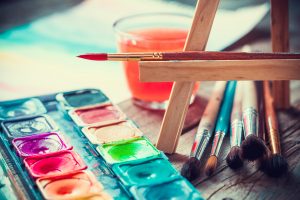
Once the sewing machine needle is the pen we need ink. And that's where the thread comes in. Your entire thread stash becomes your ink and paints. Now you can change the colours and vary the thickness of the lines by the thread weight. You can add WOW with variegated lines that change colour, or glow in the dark or glitter like gold. Add sheen with lovely light reflecting tri-lobal polyester or go for a flat matt line with a 40 weight cotton. You can even choose bold lines that stand out or very fine lines that blend in.

If you haven't fallen in love with thread before, you will now!

Enough with tools and materials, lets get back to the berries. In the photo below you can see all the tools and materials. The easel frame is ready perfectly tensioning the canvas. The sewing machine pen is poised, ready to draw and a variety of paints/threads are on hand to draw with.

Machine Quilter frame

On the Machine Quilter frame I've pieced a simple canvas. The fabric was deliberately chosen to show off the thread and applique, then stitched it together in simple strips. I've found that the simpler my piecing, the more adventurous I'll be with my quilting. You'll notice that I've used red fleece for backing and wadding. Fleece works great for these sorts of arty projects. The black thread is from the Magnifico range of Superior Threads. This particular thread is great for thread painting. You'll see how I use it to create a sketchy ink drawn look. I've included a short video tutorial from our Little Bag of Moonshine subscription range. This short video clip will take you step by step through the process. The moving image shows most clearly just how I'm using the sewing machine needle as a pen. I think you'll enjoy seeing the movement, but first,

 a few screen grabs with directions

red stash fabrics
get some red netting, go from orangy reds all the way to bluey pinks.
strawberry threads

Choose your fabrics for the berries. I've tried a range of reds, from the bright orangey reds all the way to the darker bluey pinks.

Get some netting, sheers or tulle in summer fruit shades. It's fun to audition different colours. They act almost like filters over your fabrics.

Now pick some threads. I went for black initially, for the pen and ink look. But I had fun playing with other colours, weights and fibres too.

strawberry shapes
cut out strawberry shapes
red strawberry shapes

Draw some strawberry shapes with the black thread. They don't need to be perfect.

Cut out some similar, slightly larger strawberry shapes from the red fabric.

Now place the red fabric strawberries over the black line drawn shapes.

add the netting
gently tug the netting up and cut around the stitched line

Cut the netting to be larger than the red strawberry shapes and place the netting over the fabric strawberries.

Begin at the top of the strawberry just under the crown or hull. Use your needle to echo the strawberry shape slightly inside the red fabric. finish at the hull and add some spiky bits.

Gently tug the netting up and cut around the stitched line.

the finished applique
make more strawberries

That's the first strawberry finished! Ever so quickly appliqued in place directly on your frame.

That was so fun and easy you could make more. Try to vary the design by playing with different fabrics, netting and shapes.

Keep on adding strawberries to your hearts content. Soon you'll have a whole berry patch!

It was much easier to actually applique the strawberries than it was to write the tutorial! I think the moving image is most helpful here.

Take a peek at the short video tutorial.